Some Fundamental Settings for using Beagle Camera
Update: 2023-02-25
1. Select your printer model
***Before you start printing, you need to set up your printer model first.
In the Beagleprint app, you can switch to the printer model setting by clicking on the gear icon located at the bottom right corner. From there, you can customize the printer name (which will be displayed on the app homepage), select your printer brand/model, and the size will generally be auto-generated. There's no need to set the Baud Rate as the 3D Printer Camera will automatically search and match it (firmware V1.1.0+).


In the control page of your browser (if you don't know how to access it, you can refer to "How to figure out the IP address of Beagle Camera?"), you can find the "Setting" column on the left side. Click on it, and then find the "Printer" option. Click on the dropdown button ↓ and select your printer brand and model.
Note: If your printer model is not found in the list, you can try "custom" (the last option in the brand/model list) and manually set the print size.
***Setting an incorrect printer model may cause the printer to collide during printing.
2. Connect printer.
Once you have set up your printer model, you can attempt to connect your Camera with the printer in order to control and execute printing tasks.
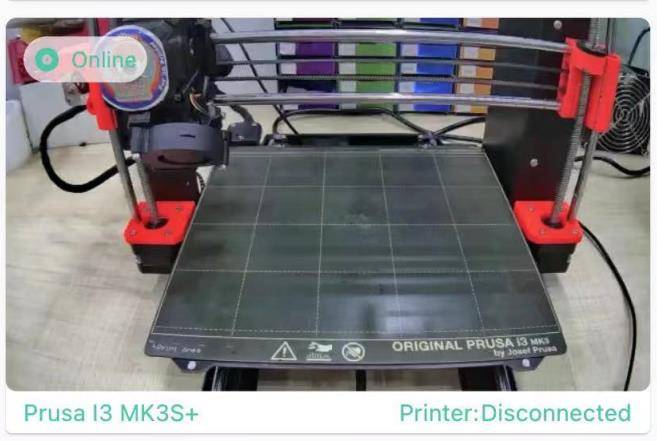
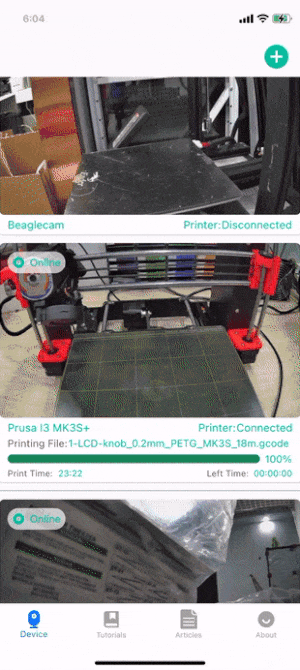
Please refer to the image below for an illustration of the 3D Printer Camera not connected to a printer


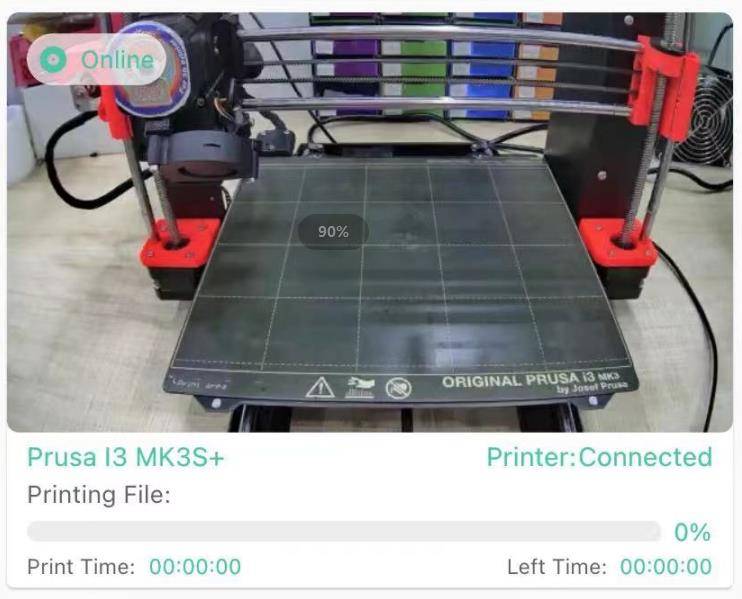
Example when the 3D Printer Camera is connected to the printer
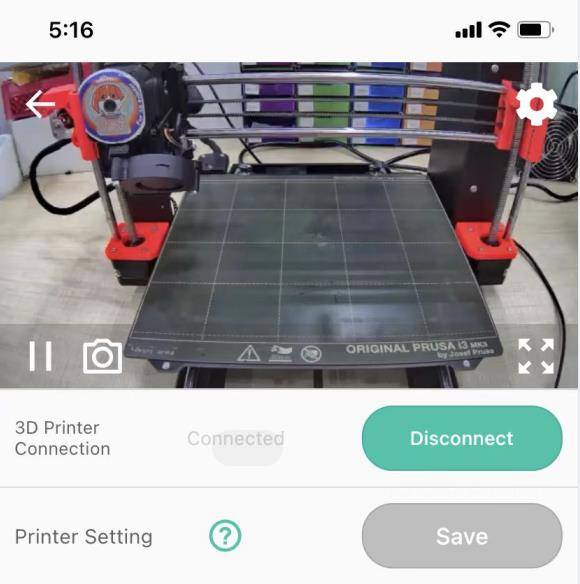

Note: Generally, you do not need to perform this operation, as the Camera will attempt to establish a serial connection to the printer within the first 1-2 minutes after startup.
For some printers, such as Prusa I3 MK3S+, the motherboard will reset when connected via serial port. Therefore, be aware that if your printer is printing via the micro SD card slot, do not attempt to connect the Camera to the printer. Alternatively, if you are printing via the Camera's serial port connection, do not click the "Disconnect" button as this will cause the print to stop.
3. Setting up time-lapse video mode.
The Beagle Camera comes with a default "Clean Time-lapse Video" mode for time-lapse video. In this mode, after each layer is printed, the hotend and hot bed will move to one side, take a photo of the printed object, and finally generate a video to showcase the entire printing process (such as the growth process).

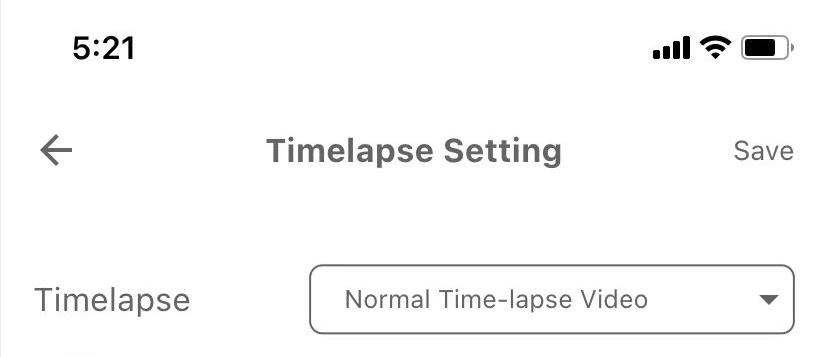
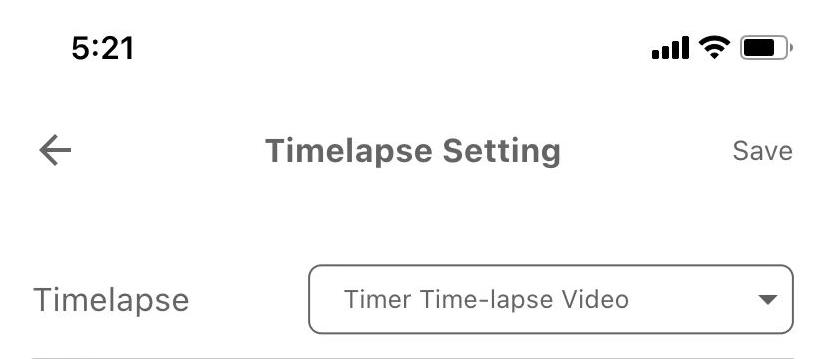
Of course, there are also "Normal Time-lapse Video" and "Timer Time-lapse Video" modes for Timelapse video.
In "Normal Time-lapse Video" mode, images are taken of the printing model at each layer, but unlike "Clean Time-lapse Video", there is no additional movement of the nozzle and hotbed positions.
"Timer Time-lapse Video" mode captures images at a specified time interval to create a time-lapse video. This mode does not depend on the layer height of the print file, which means that a time-lapse video can be generated regardless of whether the Camera is connected to the printer or not.
If you only want to use the remote monitoring and file uploading functions of the Beagle Camera, you can set the Timelapse mode to "OFF".

Note: Using timelapse mode can potentially reduce print quality as pausing during printing can affect layer adhesion. Additionally, in "Clean Time-lapse Video" mode, the printer may move the hotend/bed to one side and take a picture after completing each layer, which can also impact print quality. If the parameters are not set correctly or the filament is too moist, the model's surface may appear stringy or oozing.
If have this problem, you can refer this:
How to improve the spotting and stringing problems caused by time-lapse photography?
4. Upload Gcode file.
(be mindful of the file size before and after uploading, to avoid uploading files with the same name).
You can upload G-code files (".gcode, .gco, .g" suffix files are not case-sensitive) through the Beagleprint app or browser page. The files will be uploaded from the storage of your mobile phone or PC to the Micro SD card in the Camera via a network connection.
Note: When uploading files, it is important to check the file size before and after uploading. If there is a significant difference in file size, it may be necessary to delete the previously uploaded file and try again.
Also, it is important to avoid uploading files with the same name as existing files on the camera.
5. To start printing
You can locate the corresponding G-code file in the BeaglePrint app or browser page, and click the "Print" button to initiate the print job.

Observing the Printing process (What can be seen? What can be done? What issues can be encountered?)
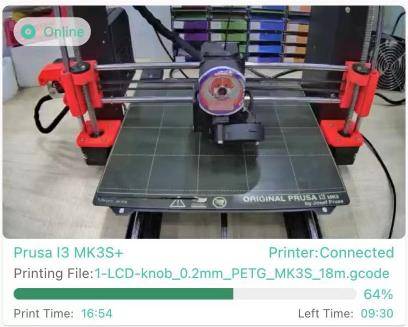
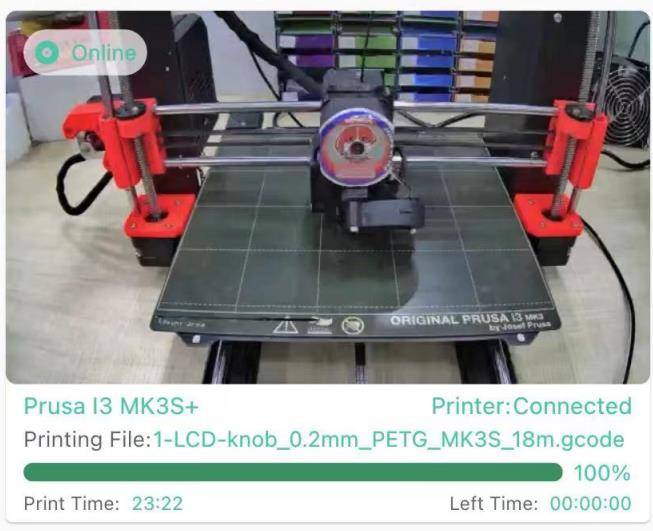
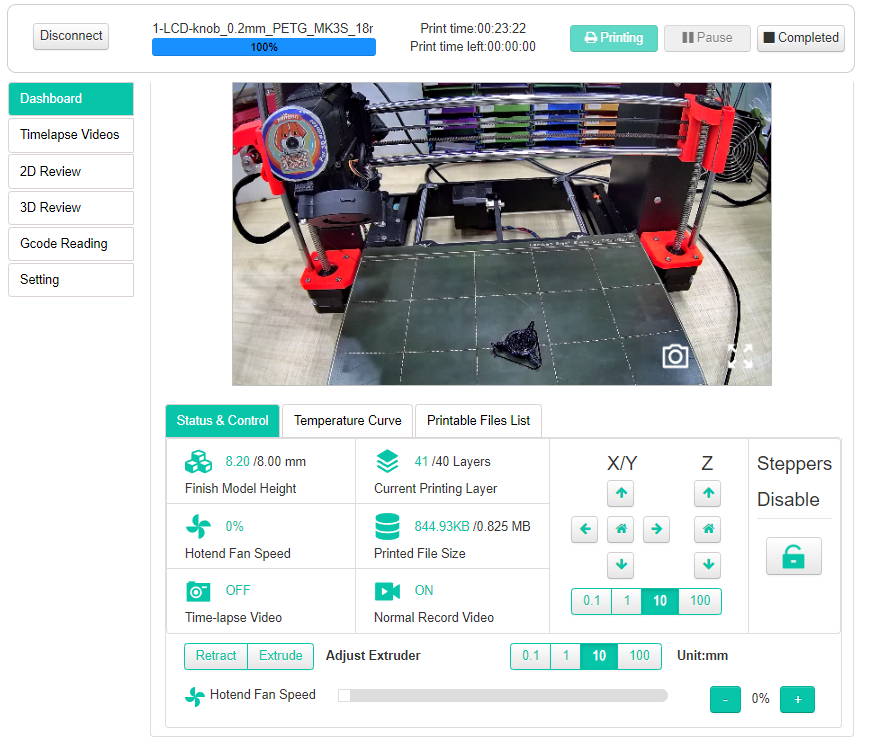
You can see the name of the file being printed and the progress of the print (percentage completed, time elapsed, and remaining print time) on the "Device" page. On the dashboard page, you can see more progress information such as the model height, layer thickness, model cooling fan, file size, time-lapse mode, and camera recording mode.


6. Printing complete.
Upon the completion of the printing process, your mobile device will receive a message push notification. You can enable or disable the "Notification" feature by accessing the "About" page located in the main interface of the app.

Regarding the completion of the printing process, if you have enabled the time-lapse photography feature, you can find the newly generated video file in the video file list 5 minutes after the completion of printing. You may then proceed to download or delete it.
Note: After the printing process is complete, the video enters the rendering stage. It is recommended to wait for 5-10 minutes before clicking the download button, as attempting to download during the rendering process may result in the video rendering failure and inability to play. Additionally, if you have not generated a time-lapse video, it is highly likely that you did not print using the Camera function. Please refer to step four for further guidance.